 Qtractor An Audio/MIDI multi-track sequencer
The features described below are not available in currently released versions of qtractor yet. If you want to use them, you need to build your own version of qtractor from the latest svn-revision. The features may also undergo changes as well as the documentation below.
Aside of one take recordings, you can create multiple takes continuously by using the loop recording mode. To enable the loop recording mode, go to View > Options and on the ‘General’ tab set ‘Loop Recording mode(takes)’ to either ‘first’ or ‘last’. This will control whether qtractor chooses the first or the last take by default.
After you have enabled the loop recording mode select a loop range. To do so, position the edit markers by left-clicking onto the timeline where you want your loop range to start and right-clicking at the end. Now select Transport > Loop (or press Ctrl+Shift+L). This will create a loop range out of your edit range and enables the loop mode as well. Just arm the track you want to record to, press record and play. Qtractor will start recording but when it reaches the end of your loop range, it will wrap around and start recording a new take of your loop range. You can record as many takes as you wish and decide later wich one you like the most.
After having recorded some takes, select your new clip and go to Clip > Takes > Select to choose between the different takes. You could also press Shift+T to iterate over the recorded takes.
It is also possible, to combine punch in/out recording with looped takes recording. Just create a new Loop range as before. Now, create a punch in/out range inside your loop range. Recording now starts as soon as you enter your punch in/out range. If you leave the range, recording stops, but will start recording another take a soon as your loop starts over and reaches the punch in point again.

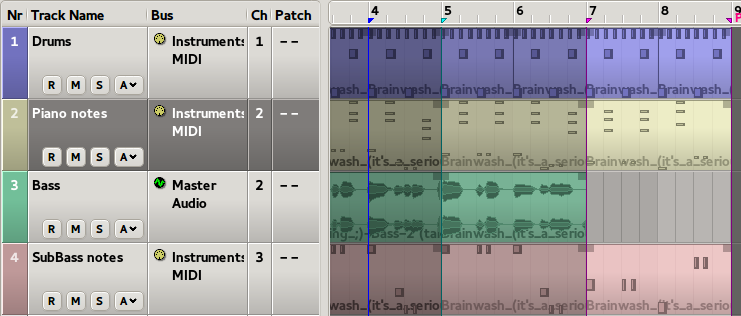
The images above shows a punch in/out range(purple markers) inside a loop range(green markers).
Takes are implemented in a way, that they are appended to each other. In other words, multiple recorded takes will result in a single clip that contains all takes appended to each other. By having activated the takes mode, qtractor will show you only a section of this clip with the size of the selected loop range. If you go to Clip > Take > Select and choose ‘None’, qtractor will ‘unfold’ your takes and shows the recorded clip in its full length.
Once you know how takes are implemented, you can create takes from every clip you like. For example, select a clip and place the edit markers within a fraction of your clip. If you have a clip that is four measures long, place the first edit marker at the beginning of the clip and the last at the beginning of the second measure. Now go to Clip > Take > Range. In the upcomming dialog, choose ‘Edit’. The box on the right of this dialog will show the resulting number of takes. In this case it will create four takes(one for each measure). Just click on the take you want to select. As you can see, takes could be created by a variety of ranges. Just use the one that fits your needs best.